


How To Resize Pants When They Are Too Big
*This post may include affiliate links, which allow me to make a small commission off your purchases. The money is earned at no additional cost to you.
Below, you will find an in-depth blog about how to resize pants. Also, I’ve created a YouTube video detailing how to complete the tasks.
To watch the YouTube video, click here. To continue reading, see below. 🙂
Supply List
There are just a few supplies you will need for completing the tasks of resizing your pants. The list is as follows:
- Measuring Tape (Cute handmade tape)(Standard tape)
- Ruler
- Dressmakers Chalk or a FriXion Pen
The First Step To Resizing Pants Is To Measure Yourself.
There are 3 basic measurements you need to be concerned about when learning how to resize pants.
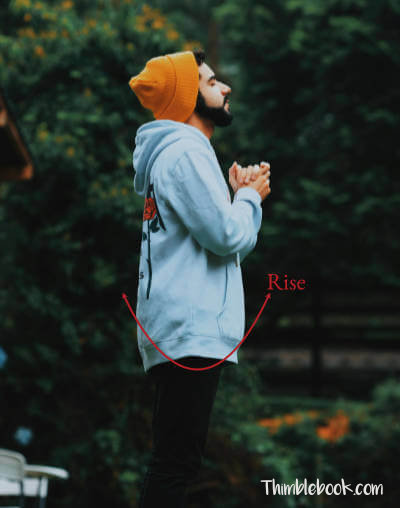
1 ) Rise: There are 3 different types of rise. But, most folks generalize and list rise as what should be called front rise instead. We don’t want the front rise for this measurement. Instead, we want to know total rise measurement.
- Front Rise: Measure from lowest point of crotch to top of waist band in the front of your body.
- Back Rise: Lowest Point of crotch to top of waist band in the back.
- Rise: From top of front waistband, thru the legs, and up to top of waistband in back.
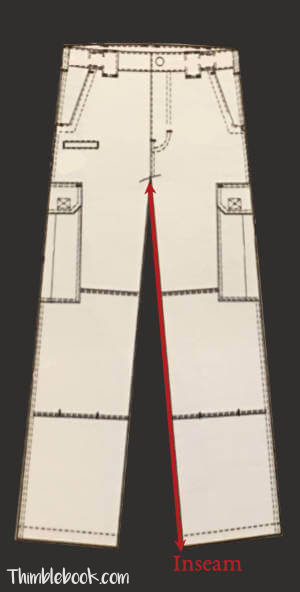
2. Inseam: A measurement from the lowest part of your crotch down to your ankles. It explains exactly how long or short the pants should be.
3. Waist: This measurement is often slight more complicated for females than men.

This is the regular waistband starting at the very top of your hip bones.
- Male: Measure around the top of your hipbone all the way around.

This is the high waistband, which starts just above your belly button.
- Female: Women have high waisted pants and regular style pants. For high waisted pants, dresses, or skirts, measure the smallest part of your waist. The smallest part of your waist is the area just above your belly button at the bottom of your rib cage. If you have a hard time finding the smallest part of your waist, simple lean to one side and find the place where your torso bends inwards. For regular pants, however, you need to place the tape at the top of your hip bones and measure all the way around.
Once you get measurements, jot them down on a sheet of paper and move to the next step.
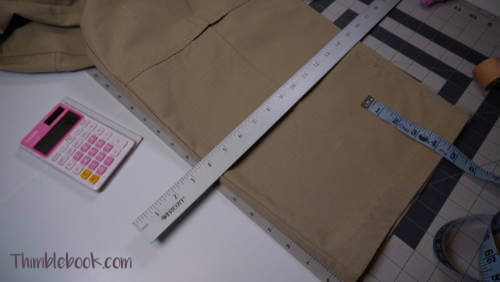
The Next Step Is To Measure The Pants.
Make the same measurements for the pants as you did for your body.
Then, Find The Difference.
I really hate math. But, we have to do a little math to complete this project. So, substract all of the pants measurements from the measurements on your body.
Rise on pants – Your Rise = A
Pants Inseam – Your Inseam= B
Waist on pants – Your Waist = C
Make Changes To The Rise & Inseam.

Make adjustments to the rise by adjusting this inside seam on the pants.
If the pants are too baggy in the crotch, you will need to adjust the rise.
On pants super baggy in the legs and in the rise, use an serger to sew up the inner seam just under the measurement (A). For example, with an (A) measurement of 1 inch , you’ll want to serge at 5/8ths. If you don’t have a serger, simply use a standard sewing machine to sew up the inseam. Then, use a zigzag or overlock stitch to finish the edges.
For pants that are already skinny in the legs but too baggy in the crotch, you’ll want to only remove extra length in the crotch and leave the leg seams alone. To accomplish this, simply mark where you would like the lowest point of the crotch line to be. Then, grade this point back into the original leg seam with tailors chalk. Now, sew along the freshly created seam.
The inseam strategy is different depending upon what kind of pants you have.
So, I’ll detail the two most common pants and the strategies for shortening the pants below.
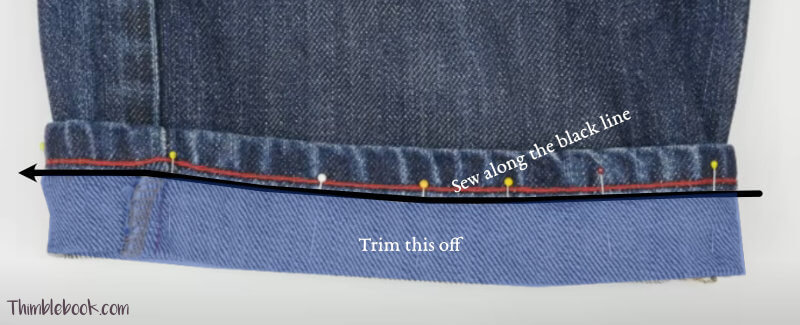
Jeans: For jeans, it is important to keep the natural washed edge of your hem in tact. To do so, fold up the pants to (B). Make a stitch slightly underneath the stitch line on the hem of your pants. Cut away the access fabric.
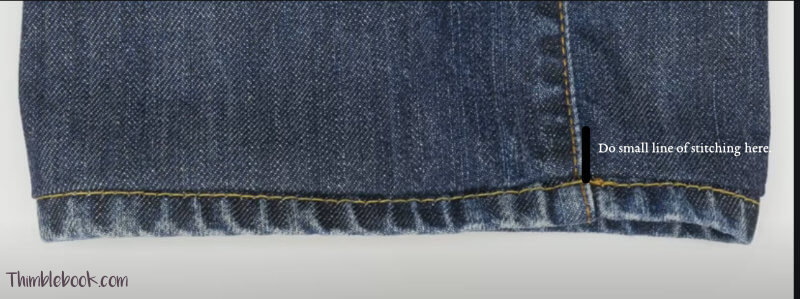
Then, finish the edges of the cut away fabric. Now, turn the pants hem right side out and stitch along the side seams to keep the hem turned to the right side.
Regular Pants: For regular pants, there is a little math involved.
(B) – length of hem – 1/2 inch = (D) Amount of fabric to cut.
Use a ruler to mark above the hem at (D). Then, cut along the marked line. Fold the pants under 1/2 and press. Then, fold the pants up the length of the hem and sew it all down.
Work On The Waist
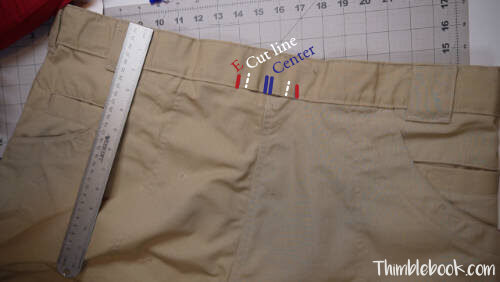
This part of the process seems intimidating, but it is quite easy. To start, unpick the back belt buckle that typically rests in the center back of the pants. Then, mark the center of the pants making sure this mark can easily be hidden by the belt loop you just removed.
Measurement (C) divided by 1/2 = (E)
Make one mark on each side of the center mark using measurement (E). Now, grade those measurement (E) marks back into the center of the pants seam. (see illustration)
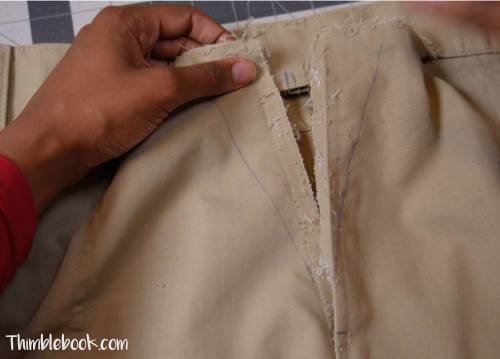
Before going any further, make another mark on the inside of (E) at 1/2inch. This is your cut mark for the waistband. Now, unpick the waistband from the pants about 1 inch beyond the farthest marks on each side. Also, unpick the pants center seam down to one inch below the grade marks. Measure the original seam allowance and mark in from the grade marks the same amount of seam allowance.
Cut the seam. Now, stitch it back together using the same method as was used for the pants. Last and not least, cut your waistband on those marks we created earlier which are 1/2 inside of (E). Sew the waistband back together with right sides facing. Now, reattach the waistband and belt loop.
Congratulations: You Just Learned How To Resize Pants…
I know it seems like a long process. But, once you get the swing of things, you will feel confident in resizing pants and be able to do it very quickly.
No Comments