


What to Do When You’ve Bought The Wrong Size Pattern
*This post may include affiliate links, which allow me to make a small commission off your purchases. The money is earned at no additional cost to you.
I bought the wrong size pattern! Last winter, Hobby Lobby had a sale on Simplicity patterns. During the sales week, I made multiple trips and bought many spring and summer patterns. I also bought fabric for each project and set everything aside for summer sewing. Unfortunately, one of those patterns was the wrong size and I couldn’t make an exchange because the pattern was discontinued. This blog will detail how to save the day when you’ve bought the wrong size pattern.
You’ve bought the wrong size pattern.
Now, its time to see if the pattern is still available in stores. If so, go to the store and exchange the pattern for the correct size.
Oh no! The pattern is discontinued.
Your pattern is still not a total loss. You can grade the pattern down or up.The first step to correcting problem when you’ve bought the wrong size pattern is to…
Take your measurements.
Decide which size you would have worn on the pattern directions. In my case, I would have worn a size 6. However, I purchased a size 14 – 22 pattern envelope. This means I needed to scale size 14 down by 4 sizes. I know it sounds like scaling the pattern down would be a lot of work. However, it’s easy because I use the lazy method.
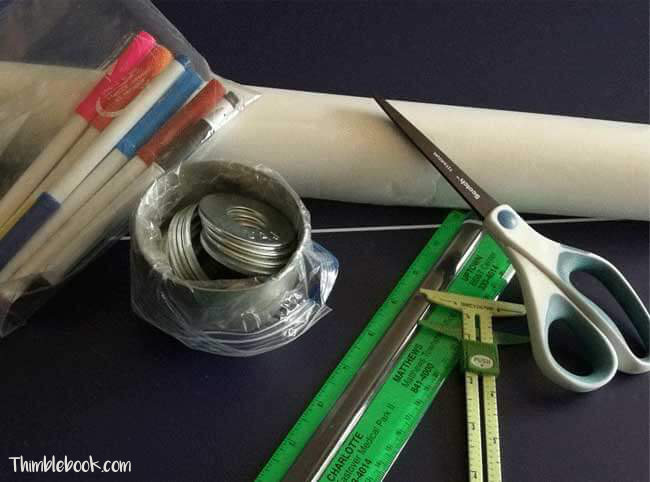
For the lazy pattern scaling approach you will need:
- A solid work surface
- Pattern weights
- Medical table paper
- Thin magic markers
- A ruler
- Seam gauge
- Scissors
Skip the complicated math, use the lazy method.
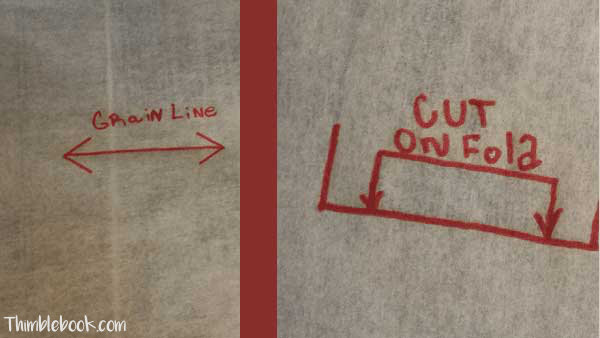
Trace the grain line on each pattern piece. For cut-on-fold pattern pieces, simply trace the straight lined side all the way down. These lines will serve as a guide in the following steps.
For each drawn line, you’ll repeat the steps below.
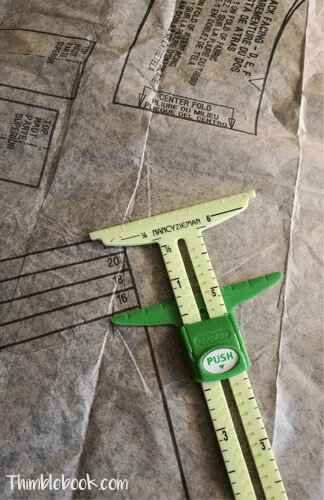
Use your seam gauge to figure out how much room is between sizes. I needed to scale my pattern down 4 sizes. So, I opened the seam gauge to reflect the difference between size 22 and size 14.
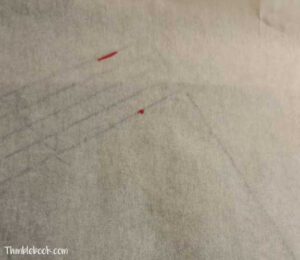
Place your seam gauge down on the closest size to your measurements.
Then, draw a dot to mark the space between sizes discovered in the last step.
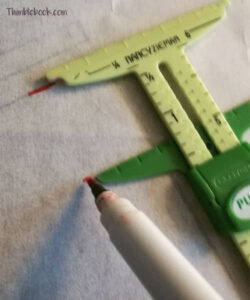
Slide your pattern tracing paper so the dot matches up with the size closest to your size.
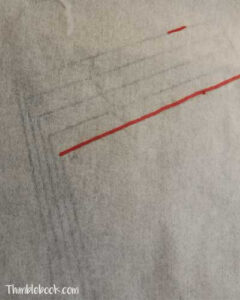
Trace the line.
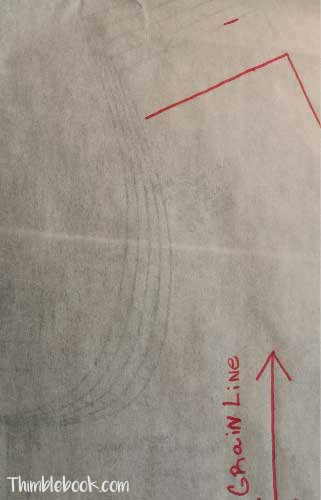
Slide your pattern tracing paper back to home position…
…by lining up the paper with the grain line or straight line created in the first step.
Rinse and repeat this process until your pattern has been scaled to the right size.
The last step is to cut out your pattern pieces and try them on to make sure the fit is good. I like to clip my paper patterns together with wonder clips for this step. I hope this blog was helpful. Do you have any different approaches to scaling patterns? If so, let me know about them in the comments!
No Comments