


How to Service a Sewing Machine
*This post may include affiliate links, which allow me to make a small commission off your purchases. The money is earned at no additional cost to you.
You may not have the time or money to get your sewing machine professionally serviced every year. But, this short guide will give you insight about how service a perfectly working sewing machine yourself. I realize many aren’t able to grasp an understanding of this subject without a video follow along. Therefore, I have created a YouTube video so you can follow along with the process.
Who is This Tutorial Designed To Help?
This “How to Service A Sewing Machine” tutorial is designed for mechanical sewing machine owners. Within this tutorial, I’ve primarily considered those who are looking to do the 1 year service of a machine in otherwise working condition. I do understand some of you are looking to service a machine with problems. While problems are not the primary focus of this tutorial, we will touch on the problems most sewing machine service technicians check when working on a machine.
When a sewing machine has problems, I recommend taking it to a shop because 70% of said problems have to do with screws that need to be adjusted. I cannot specify where to make adjustments for specific problems because each machine is configured a little differently.
Personally, I am able to make adjustments by taking a careful look to see what screw controls which function. I would not, however, recommend for anyone else to do this because things can be permanently thrown off balance by making the incorrect adjustments.
*** This tutorial is not a replacement for professional servicing. With this in mind, realize Thimblebook will not be responsible for any mistakes made by users. When in doubt, always seek the advice of a professional.***
Each Machine is Unique & Beautifully Made 🙂
While each machine is unique, the general process for servicing ALL mechanical sewing machines is always the same. As you learn how to service a sewing machine, you will find yourself:
- Disassembling
- Cleaning
- Oiling
- Checking & making adjustments
- Reassembling the machine
Since each machine is a little different, I will work to service all 3 of my mechanical sewing machines just to give you a broad perspective on how the process should be completed. Don’t worry if you don’t see your particular model sewing machine on this list. You can always learn how to work with your own machine by observing the process on similar looking machines. The machines I will be servicing today are:
- Kenmore 158.1941.2 (Zig zag + stretch stitch)
- Emdeko JA21 (Japanese class 15 zigzag sewing machine with side needle plate)
- Bernina 1010 (Basic zigzag and straight stitch sewing machine)
What Do You Need In This “How to Service a Sewing Machine” Tutorial
For this tutorial, you will need:
- Assorted Screw Drivers + Metric Socket Set (for some models)
- Container(s) or magnet to store screws temporarily
- Sewing Machine Oil
- Toothbrush and/or a small brush
- Microfiber Cloth
- Kerosene (not a must, but very important to use in gummed up machines)
- Tri Flow Clear Grease
- Canned Air & or a Mini Vacuum
- Spool Brush
- Dental Floss
Disassembly
Left
As a general rule of thumb, I start from left to right with the disassembly process. First remove the sewing needle and presser foot. Then, remove the needle plate, bobbin case, and bobbin case housing. Place all of these items in a cup so they all stay together.
Top/Back
Next, work from the top of your sewing machine to remove the lid if applicable. With a Bernina, there is no 100% comprehensive way to get into the machine from the top. Instead, you will work to remove the back over to the machine + the back plate to the free arm. Regardless of if you are removing the top cover or the back, place your screws and parts to this section in a container separate from the first so nothing gets lost or non-arranged.
Right
Last, open up the side plate to the sewing machine. For each machine, this opening process will be a little different. Check the illustration above for info on how various side plates get opened.
On any machine that takes multiple belts, you’ll want to remove the speed deduction belt (the tiny gear with a small belt attached to it). Since it is a fast moving part, you’ll need to do maintenance on it later. Now, we are ready to start cleaning.
Cleaning
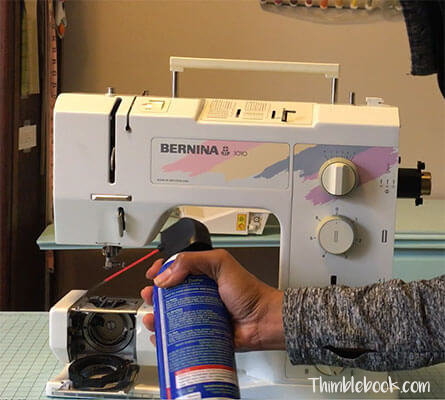
Start on the left side your your sewing machine by using canned air or a vacuum to remove dirt. Pay the most attention to the needle plate area because this is where the most thread and dust accumulate. Work your way from the left to the right side of the machine blowing away all of the dust and loose particles.
Once your machine is cleaned out with the vacuum or canned air, use the spool brush to go back over the tight, difficult to reach, areas. For those of you with greasy gunk in the machine, dampen a toothbrush with kerosene and use it to clear away the gunk.
Now, use dental floss to thread the upper part of your sewing machine. Pull the dental floss thru to remove any loose thread particles from the upper threader. Once this is done, put a few drops of kerosene onto your microfiber cloth and run it thru the upper threader disc. This will clear away any dirt or remaining particles.
Oiling
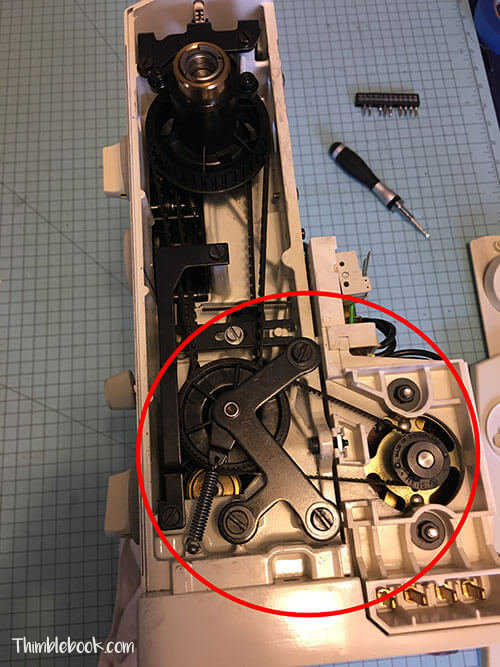
Start from left to right with oiling any moving parts. Now, plug in your sewing machine and press down on the foot control to help cycle the oil thru your machine. Once you have given your sewing machine a full oiling, find any gear-on-gear parts and smear a generous amount of Triflow synthetic grease on them.
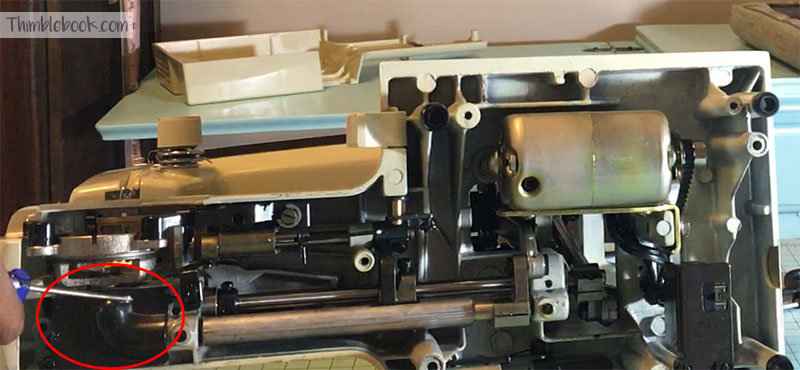
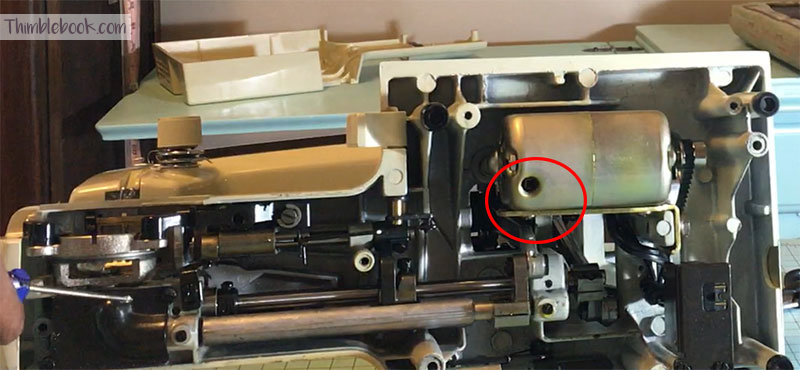
*One notable gear-on-gear connection to remember on Kenmore 158.1941 is inside the black gear box located underneath the machine on the left hand side.
For a machine with a speed deduction wheel, remove the screw. Clean the shaft and place a generous amount of oil on it. Then, check for any wear and put it back together. 9 times out of 10, the speed reduction wheel will still be in fair condition. For any major problems, however, you will need to find a replacement.
Checking & making adjustments
This is by-far, the most important step in this tutorial on how to service a sewing machine.
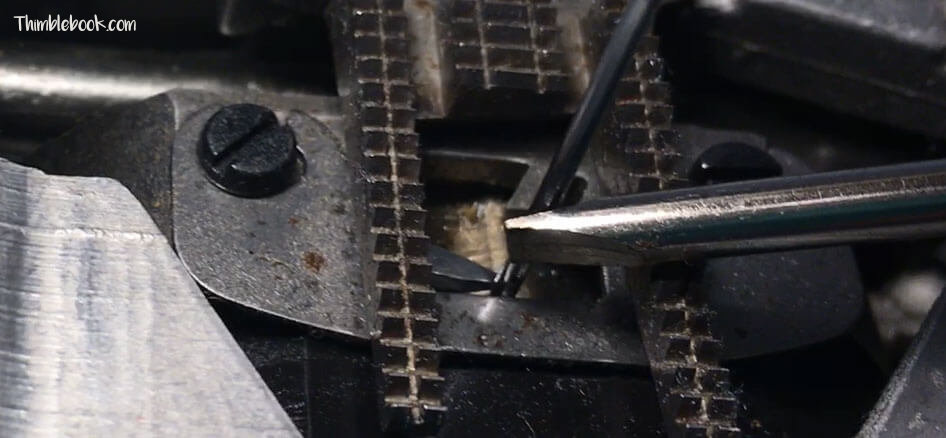
Shuttle Hook Inspection
First, take a look at the shuttle hook and see if there are any nicks or burs present. For a damaged metal shuttle hook, you can simply take it over to a sanding wheel or use Dremel to sand the area smooth. In addition, you will need to check the bobbin case for any dents and/or problems. Do a yoyo test by holding the yarn whilst it is loaded inside the bobbin case. Your bobbin case should drop a little lower when you shake the thread with a downward motion like a yoyo. Otherwise, use the screw on the side to make adjustments. No luck with getting the bobbin case to function? Purchase a new one!
In machines with a horizontal plastic bobbin case instead of a metal shuttle hook, you will need to check for nicks or burrs. Replace the plastic bobbin case if you find any problems. It is important to have a perfect hook (regardless of the configuration) because any damage will cause your sewing machine to have problems with stitches and/or stitch quality.
Needle Plate Observations
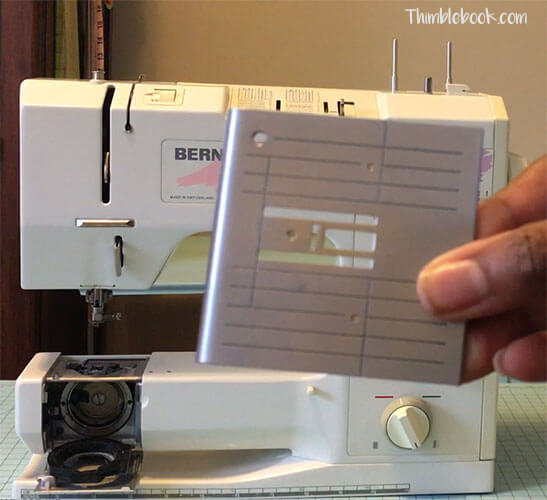
Now, take a look at the needle plate. Are there any dents or scrapes in the needle plate that could interfere with your thread? If so, you will need to order a needle plate replacement.
Partial Re-assembly
Partially reassemble the sewing machine so we can do the function check. To begin, you will need to put the bobbin shuttle and bobbin case back into your machine. Then, re-attach the needle plate and add a new needle into the machine. For a machine with a speed deduction wheel, re-attach the wheel and screw it back in place. Now, plug your machine in and attach the foot control temporarily.
Function Check
Speed:
Depress the foot control a little bit and increase the pressure in small increments to make sure the speed changes accordingly.
For a Bernina foot control, there are adjustments you can make to the foot control to adjust the speed. If the speed adjustments don’t work for your Bernina foot control, you will either need to test and replace blown fuses or replace the entire foot control with a new one. * Note: Blown fuse replacement requires an understanding of how to test fuses and solder on new ones.
For non-adjustable foot controls with problems, it is best to just order a new one. In the past, I have done many repairs on old carbon pile foot controls. But ultimately, its better to start fresh because a bad foot control can be a serious fire hazard.
Below, we will be discussing two main areas where service technicians look for problems. Since the location of screws/adjustment points is a little different for each machine, I would strongly recommend taking your machine to a professional if you run into these issues.
1. Hook Needle Distance (TIMING):
Turn the handwheel towards you until the hook comes to its highest point. There should only be a tiny amount of space between the hook and the sewing machine needle. To double check for the right amount of space, take a screw driver and gently push against the sewing machine needle. Your sewing machine needle should touch the hook with the slightest amount of pressure applied via screw driver. For machines without the right amount of distance between the hook and needle, an adjustment will need to be made to the needle bar position.

Also, you want to make sure your needle sits farther to the back of your needle plate than to the front. When the position of your needle is off (in relation to the needle plate), you will have difficulty sewing with larger sized needles. Therefore, you will need to make an adjustment.
2. LEFT, MIDDLE, RIGHT:
Some machines have LEFT, MIDDLE, RIGHT needle positions. These machines often fall out of alignment and need to be re-adjusted. For a machine with L,M,R, set your machine to left and see if the needle is in perfect left alignment. Then, set the machine to the middle and right. For a machine off balance, there is a screw for making fine adjustments.
Motor:
For machines with motor brushes, you will need to open the motor brush housing and look at your motor brushes to see if they are worn. 90% of machines with motor brushes, will have a small port on the side that holds the brush(s).
Machines with brushes worn down to 1/4 need to be replaced with brand new motor brushes. Amazon or online hardware stores are the best place to find motor brushes as most hardware stores, at least in my local area, no longer carry brush replacements in-store. Once your motor brushes are replaced, you will find your machine has more power/force when the foot control is pressed. You may also discover your machine has become quieter with less buzzing.
On many sewing machines, there is a wick inside that takes oil. For a motor with a wick inside, add 3 to 5 small drops of oil in. This will allow your motor to run smoother.
*WARNING: Don’t place too many drops of oil inside because it will cause the motor to smoke.
Belts:
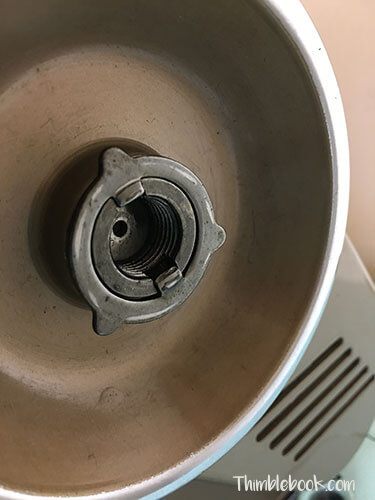
Check your sewing machine belts to see if you have any tearing, disintegration, or visible problems. Also, check the pulley on your motor to make sure it isn’t damaged. To replace the pulley, simply unscrew it and replace it with a new one of the same diameter.
To replace a bad belt, however, you will need to do a little bit more work. First, remove the handwheel to get the belt off. Curious about what size belt to get??? Measure around the belt and convert inches to millimeters. On my Emdeko JA21, the belt is 13.7 inches and 350 millimeters. Therefore, the machine takes an MB350 sewing machine belt. Once you’ve figured gotten a new belt, install it and re-assemble the handwheel.
Here are a few things to note when you are replacing your motor belt.
- The hand wheel stop (for winding a bobbin) is controlled by a ring with 3 points. The ring should be put back onto your machine with the 3 points facing outwards. One point should be positioned at 12 o’clock and the other 2 points should be at 4 o’clock and 7oclock respectively.
- Your motor belt shouldn’t be too loose or tight. As a general rule, you should be able to depress the belt about 1/2 inch when it is attached to the pulley.
Last Check:
Test sew a straight stitch and a zigzag on the sewing machine to make sure it is functioning correctly. Then, make any necessary adjustments. Once adjustments are made, take a look at the bobbin tire to see if it is cracked or worn. Replace a cracked bobbin tire with a new one. Once you see all is good, it’s time to reassemble.
Reassembling the machine
Put your sewing machine back together in reverse order, starting with the right side handwheel and working your way back to the left. Now, you can consider the sewing machine servicing project to be complete.
Other Helpful Articles
Kenmore 158.1941: Parts List + Everything You Need to Know
My Craigslist Bernina 1010: Restoration to Review
Everything You Need to Know About Emdeko JA21 Sewing Machine
No Comments