


The Insider’s Guide to Sewing Machine Repair Part II: Foot Pedal Repair
*This post may include affiliate links, which allow me to make a small commission off your purchases. The money is earned at no additional cost to you.
Sewing machine foot pedals receive the most wear. Therefore, it is very important to know about foot pedal repair when working with a vintage sewing machine. Electrical cord damage and sewing machine coil problems are two of the most common problems you will find with vintage foot pedals. These problems are a fire hazard. Plus, they cause your machine to work less efficiently.
If you have a standard electrical cord on your sewing machine foot pedal, check out The Insider’s Guide to Sewing Machine Repair Part I: Electrical Cords. Otherwise, check out the information below. Below, I have detailed how to repair a light/motor block cord and explained an easy method for replacing the damaged coils on your carbon pile foot control.
Working with your light and motor block electrical cord is one of the easiest foot pedal repair jobs you’ll ever do.
To repair your cord, you will need:
- Wire cutter/stripper
- X-Acto Knife
- Rolls of electrical tape in different colors
- Insulated Electrical Wire Terminals
Also, you will need cord from an old appliance, a receptacle, an outlet box
, and a cover
from the local hardware store. Or, you can opt for a light motor block kit. The outlet box method takes longer, but only cost a few cents at the local hardware store. However, the light and motor block kit takes less time, looks better, and costs more.
Foot Pedal Repair Directions:
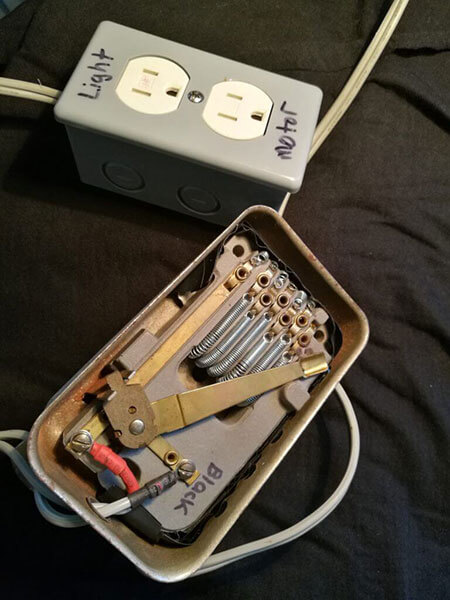
1) Remove the bottom cover from your foot pedal
2) Pay close attention to what color wire is attached to each terminal inside your foot pedal. Then, use a sharpie to mark beside the terminals so you know which terminal had what color.
3) Disconnect the wires leading from the motor block and remove them from your foot pedal. Now, you should have a foot pedal without a cord attached.
Steps 4-12 are for those who used an old appliance cord and outlet box. *Skip this section if you purchased a light motor block kit.
4) Cut the electrical cord off an old appliance with a good cord. (For this project, I used the cord off an old fan that wasn’t being used anymore).
5) Cut this electrical cord in half so you have two separate cords. One cord will have a power plug attached (Cord A), while the other half will not (Cord B).
6) Use your X-acto knife to separate the exposed wires 1 inch below the cut area.
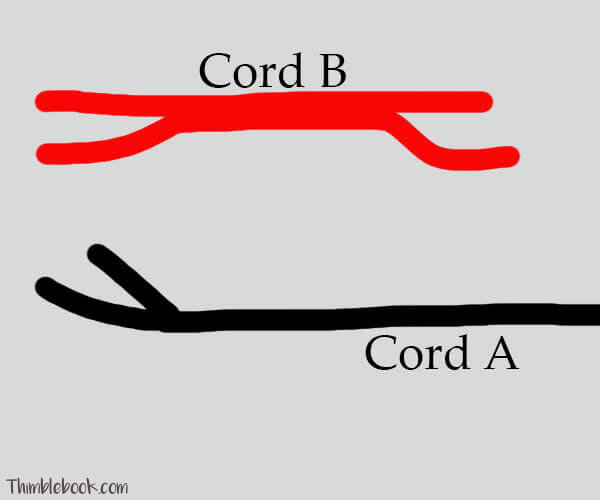
7) Strip the cords enough to place the electrical wire terminals on each of the ends. *Note: There should be 2 ends on Cord A, and 4 ends on the Cord B. *See above.
8) Wrap all 6 individual ends in electrical tape coinciding to the colors. For example, I wrapped my white wires in black tape and my black wires in red tape to keep everything separated.
9) Next, attach two of the cords from Cord B to the foot pedal by matching colors to the ones marked in step 2 (White wire to white marking, black wire to black marking).
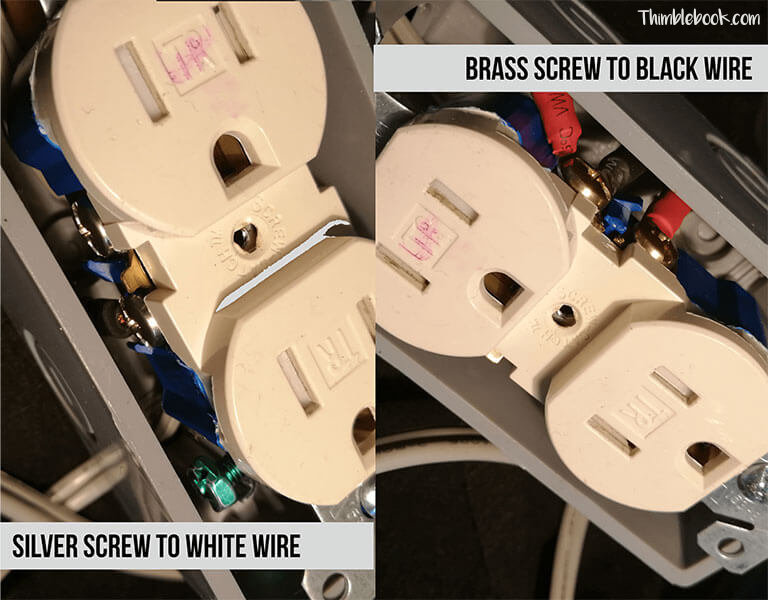
10) Take the other 2 ends of Cord B and affix them to the outlet box. To add the cords into the outlet box, match the white wire to the silver screw and the black wire to the brass screw. Note: I wrapped my black wires in red tape because the black wires are hot (with electrical current). Remember, the white wires are wrapped in black tape because they are the negatives.
11) Afterwards, affix Cord A to the outlet box by matching the white wire to the silver screw and the black wire to the brass screw.
12) Plug your complete foot pedal into a wall outlet. Then, use a house lamp figure out which outlet plug will operate the light function on your new light and motor block foot pedal.
13) Place the cover on your light/motor block foot pedal and mark the outlets accordingly.

Follow this next step if you purchased a light motor block kit. *Skip this section if you used an old appliance cord and outlet box.
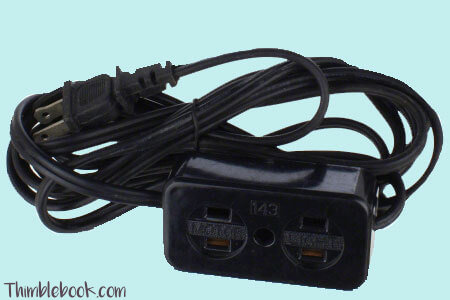
13) Attach the ends to your motor block by matching colors (black end to black terminal and white end to white terminal). Then, plug in your sewing machine and light to make sure it works well. That’s it. You’ve completed all the steps needed for a light and motor block cord repair.
However, problems are also caused when the coils wear out in an old carbon pile foot pedal.
To repair the coils on a carbon pile foot pedal, you’ll need:
1) For repairing the coils on your carbon pile foot pedal, simply unscrew the bottom of your foot pedal.
2) Once the foot pedal is unscrewed, use a screw driver to separate your ceramic block from the metal foot pedal itself.
3) Find coils to match your foot pedal inside the assorted package of coils.
4) Use needle nose pliers to remove the old coils.
5) Place new coils onto the ceramic block. Then, screw your ceramic block back to the foot pedal and re-attach the bottom cover to complete the job. I hope you’ve enjoyed these basic foot pedal repair tips.
Other Helpful Articles:
The Insider’s Guide to Sewing Machine Repair Part I: Electrical Cords
8 Comments
Leave a response
You say to replace the coils with ones from an assorted pack – where did you get the pack of coils? You gave no information on what kind of coils or how to get new ones.
Sewing machine foot pedals do not have universal coils inside them. Therefore, the coil you might need may be different than the one needed for my sewing machine. It is very inexpensive to purchase an assorted pack of coils off amazon or from your local hardware store. If you don’t want to have extra coils hanging around your house, you’ll need to open up your foot pedal and take it with you to the local hardware store to find the right sized coils. Coils can usually be found on the door hinges isle in Home Depot etc. If you have any troubles, just ask a store associate. Hope this helps!
Hi, thanks for the post! I’m restoring an old Kenmore Sears machine (model 148.210, the silvery lavender one) I got and it’s working pretty well, except the pedal is getting stuck (I guess I need to clean the spring and oil the hinges) and it gets VERY warm. Is this normal? I’m afraid it’ll just burst or something when I’m actually sewing with it. Would it be better to just replace the foot with a more modern one (though I wouldn’t like to do that since I’ve been working for a while cleaning the whole machine up and trying to keep it “period”).
My vintage machine foot pedal was getting warm before it caught fire. It would be best for you to just replace the foot pedal with a modern one. A modern one will give you better speed control and just be safer overall. Thanks for reading the post! Stay blessed.
Hi I have a project runway sewing machine and the foot pedal cord is cut how do I repair it? Can I tweet them together and use it?
Hello. Trim away 1/2 inch of the rubber/plastic coating on your cord. Also, trim away 1/2 inch of the coating on the end you want to re-attach. Twist the exposed wires together to create a brand new connection. Then, wrap electrical tape around the exposed wiring to seal it. Your foot pedal should work as normal, but just don’t leave it plugged up unattended for extra saftey. Happy Sewing:-)
The coils are just regular springs?
Yes, they are just regular springs. You just have to make sure to match the size of the springs in your existing foot control.