


The Insider’s Guide to Sewing Machine Repair Part I: Electrical Cords
*This post may include affiliate links, which allow me to make a small commission off your purchases. The money is earned at no additional cost to you.
Sewing machine repair is intimating. However, it isn’t very hard to do basic repairs on vintage sewing machines because they are mechanical and have no computerized components.
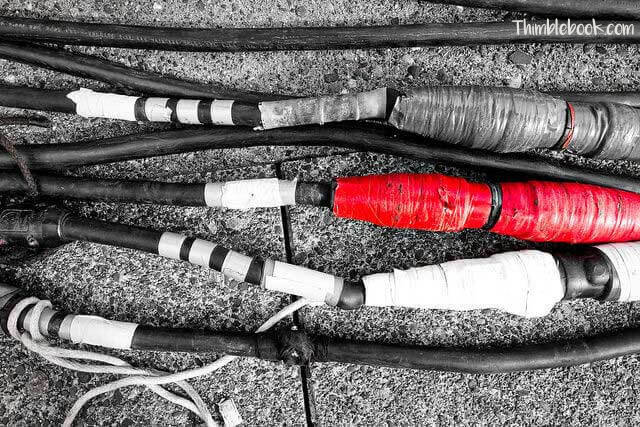
Cracked, brittle, and burned electrical cords are common and require a simple sewing machine repair.
Damaged electrical cords are a big fire hazard. Thus, such cords must be repaired or replaced right away.
*Disclaimer: All repairs are done at your own risk. Japaneseclass15 does not promise your sewing machine can be restored, neither is it responsible for any damages that may occur from making modifications.
Cord repair is easy.
I’d recommend repairing a cord that is 70% still good. After that, a replacement cord is a better option. *A good repair candidate has a few cracks, which are not too close to the sewing machine itself. In other words, you should be able to cut the cord and still have 3 to 4 inches attached.
To repair the cord, you’ll need:

Step 1: Use your wire cutters to cut the electrical cord an inch above the damaged area. This will leave you with an electrical cord without the plug attached.
Step 2: Then, cut the electrical cord off an old appliance. (For this project, I used the cord off an old fan).
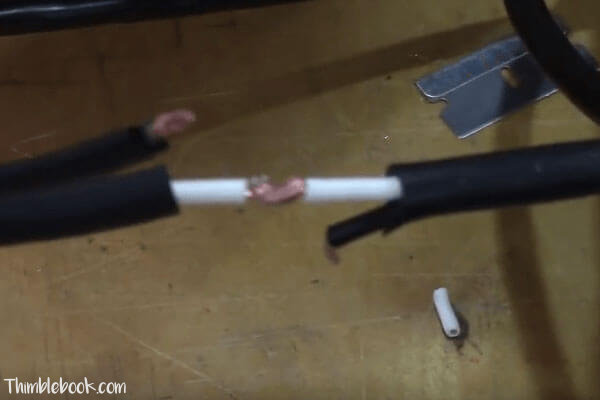
Step 3: With your X-acto knife, separate the two sides of your sewing machine cord 1-2 inches below the cut area. Repeat the same processes for the appliance electrical cord gathered in step 2.
Step 4: Use the wire stripper to expose each cord end by 1/4 inch.
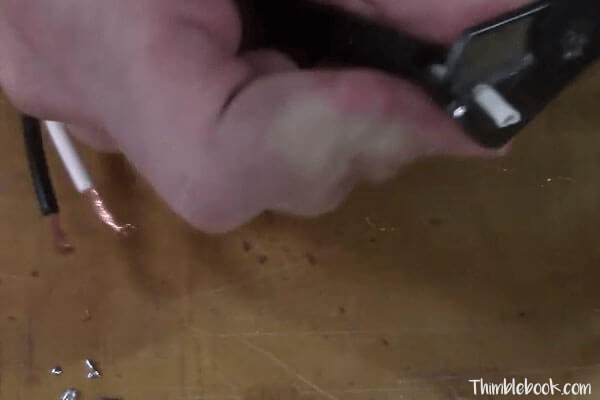
Step 5: Match colors. Black wire should be matched to black wire and white wire to white.
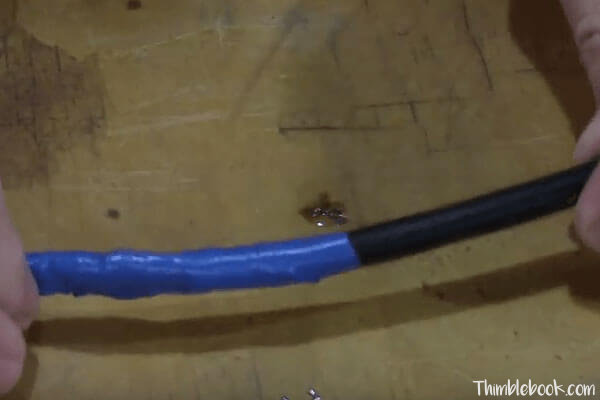
Step 6: Twist the matching exposed wires together. Then, make sure none of the opposite colors touch.
Step 7: Wrap electrical tape around the black wires and electrical tape around the white ones.
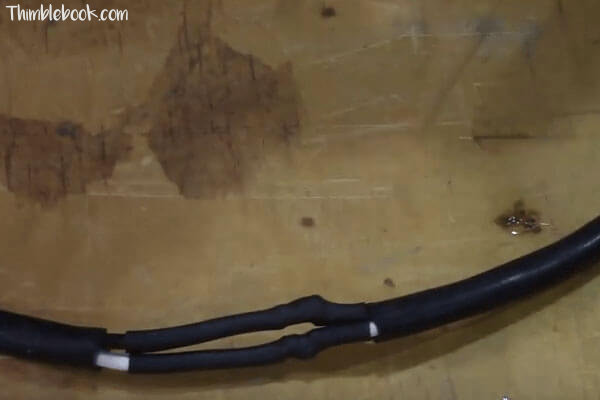
Step 8: Afterwards, join the two sides together and wrap electrical tape around to join them both together.
That’s it! With a few simple steps, you’ve repaired the cord on your sewing machine.
View a similar tutorial by visiting the AdamDIY YouTube video, “How to Repair a Cut Power Tool Cord.” Soon, I’ll be posting some other sewing machine repair tutorials.
Other Helpful Articles:
The Insider’s Guide to Sewing Machine Repair Part II: Foot Pedal Repair
1 Comment
Leave a response
Stagger cut wires by an inch making one longer than the other. They have less chance of touching.