


How To Get A Vintage Sewing Machine Working
*This post may include affiliate links, which allow me to make a small commission off your purchases. The money is earned at no additional cost to you.
This article will outline the basics of how to get a vintage sewing machine working. I will only be focusing on how to get a home sewing machine working and won’t spend time talking about industrials.
Full Arsenal of Supplies for Restoring A Vintage Sewing Machine
Baseline knowledge
Home sewing machines can be powered five different ways.
They can be powered via:
- Treadle: This type of machine has a peddle where you use your feet to drive the sewing machine like a bicycle.
- Hand crank: There is a handle on the side of the sewing machine you turn in order to power the sewing machine.
- Direct Drive: This type of machine has a motor inside of the machine that spins and turns a series of gears to power the machine. Newer models have a removable direct drive, while older ones have the direct drive fully built into the machine. The older all black machines with built in direct drive (like Singer 15-91 or Singer 201) are more difficult to repair once the motor goes bad.
- Belt : A belt runs from the motor to the sewing machine hand wheel in order to drive the sewing machine forward.
- Rubber drive wheel: There is a rubber wheel connected to the motor that drives the sewing machine forward.
There is a lot more to sewing machines. But for now, I want to keep it simple. If you want learn more then check out the article, The differences between vintage sewing machines.
Not all vintage sewing machines have all metal gears.
There are a few rare sewing machines from the 1950’s with nylon gears. But, the nylon gear revolution didn’t get in full swing until the mid 1960’s. Check your sewing machine model online to see if it has nylon gears before doing anything else. It is important check because nylon gears wear out and must be replaced. A few of us don’t have a problem with replacing nylon gears. But, gear replacements are a complicated process not meant for those who aren’t accustomed to doing mechanical repairs.
Inspection
- Turn the handwheel. If it doesn’t make a full revolution, don’t force it. When the machine turns freely, it is a good sign. When the machine doesn’t turn freely, know you will have to put in some work.
- Look at the wires. When the wires aren’t cracked, its a good sign. However, when you have wires that are cracked, know they will have to be replaced for safety. Replacing wires isn’t any more difficult than changing the cord on an old lamp. They have specialty sewing machine wires, but you can also replace them with cords from the hardware store so long as they have the same voltage range as your motor. This information is usually listed on the motor. So, don’t worry.
- Make sure your machine comes everything needed. Look to see if there are any missing buttons or missing parts on the sewing machine. Missing panels and buttons are very difficult to replace. So this is an important thing to recognize. Of course, there are those who 3d print missing parts. However, it is always best to have the original parts present. On occasion, the foot control and presser feet will be missing. Foot controls and presser feet can be easily replaced. However, these parts are very expensive to replace for brands like Bernina. Old style Bernina feet easily go for $20- $50 a piece, while foot controls run around $100 (at time of writing this blog).
- For machines with a foot control present, it is always best to plug the machine in and see if the motor turns. But, skip this step if your handwheel didn’t turn freely in step 1. For safety, plug the foot control into a power strip with an on off switch. Plug your machine in. With good rubber based shoes on your feet, press down on the foot control to see if the machine motor turns over. When the machine turns over, its a good thing. When it doesn’t work, there are a few things you can do to troubleshoot. We will cover this later.
Cleaning
Use a paint brush and an air duster to remove any lint or debris from the sewing machine. Then, take denatured alcohol to clean off all the old grease and oil out of the inside of your sewing machine. *DO NOT GET THIS ALCOHOL ON THE OUTSIDE OF YOUR SEWING MACHINE. WILL MESS UP THE PAINT FINISH.
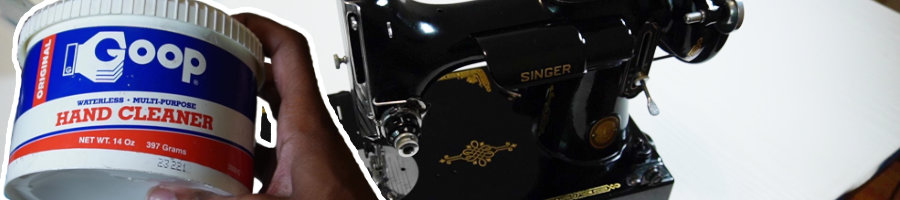
Then, use goop to remove dirt from the outside of your sewing machine. The other alternative is to use plain dawn dish soap and water to clean off the outside of your sewing machine. For black sewing machines, with Japanning method, use sewing machine oil to shine the sewing machine. For sewing machines with regular paint on them, use car wax to shine the surface.
Oiling
Oil is a very important step to get a vintage sewing machine working. You must use sewing machine oil and sewing machine oil only! I can’t tell you how many sewing machines I have found seized beyond belief because someone used wd40 or some other kind of oil to grease their sewing machine. Please don’t use anything other than sewing machine oil.
For gears, use a gear grease. NEVER use white lithium grease in your machine because it will seize it up. For machines with nylon gears, you’ll want to use a PTFE based gear grease. On metal gear machines, use a good automotive bearing grease. I have listed two greases below I enjoy using for my vintage sewing machines.
Tri Flow Clear Synthetic Grease
AeroShell 7 (This one is for your all metal gears only)
Troubleshooting
The motor doesn’t run
Carefully open your motor. Clean it with a electronics cleaner. Then, place brand new motor brushes inside. For those of you with worn wiring, take this time to replace your wires. I won’t go over how to replace wires here because there are loads of videos over on YouTube from experts on the subject.
Put everything back together, see if the motor will run. Most times, the machine will run. However, when the machine doesn’t run, its time to do some deeper investigation. For those of you who are handy, you can test your commutator with a multimeter and also test the wiring to see if it is faulty.
For those of you who are not handy, it is best to just get a replacement motor online. The motors aren’t expensive and it will save you the trouble of having to learn electrical.
It skips stitches or the tension is off
Put a fresh needle into your sewing machine. Make sure you have placed the needle in your machine with the flat side facing the correct direction. I have a full video on how to figure this out here.
For those of you with a bobbin case on your sewing machine, fill a bobbin with thread. Then, place the bobbin inside of your bobbin case. Hold the bobbin and bobbin case by the thread tail. Your bobbin case should only dispense thread when you shake the thread tail. However if your bobbin case drops toward the ground with no effort, it means you need to tighten the screw on the side of your bobbin case. Also, when your bobbin case doesn’t dispense any thread at all, it means you need to loosen the screw. When neither of these things fixes your problem, replace the bobbin case. When the problem persists, follow this next step.
Lower the handwheel to its lowest position. As the needle begins to come back up, look carefully to see if the needle hole lines up with the hook. When the hook doesn’t align with the needle hole, your timing is off. There is a screw in front of your needle bar for adjusting the needle bar height. Adjust it until your get the needle and hook lining back up. Test your machine and make fine adjustments until its sewing properly.
When the hook and needle timing is way off to where it cannot be adjusted with a mere needle bar height adjustment, It means you’ll have to loosen the gear and line everything up. This step is different depending on what model sewing machine you have. A few of you will feel comfortable with making the adjustment yourself. Others, however, will feel more comfortable taking the sewing machine to a shop at this point for timing readjustment.
The machine gets stuck because it the handwheel cannot make a full turn.
On belt driven machines, its typically an issue with the belt. Measure your belt and purchase another. On rubber wheel based machines, 9 times out of 10, you will find the rubber wheel is flat on one side. This means you will need to replace your rubber wheel with something else. When it’s not one of these two problems, the usual culprit is a seized part or a bad gear that needs replacing.
Without visually seeing a machine, its difficult for me to make a diagnosis. But, I’ve covered the overwhelming majority of problems keeping you from getting a vintage sewing machine running. Please, let me know your thoughts in the comments section below.
No Comments