


How to Make a Lined Zipper Pouch & Embroider It Too
*This post may include affiliate links, which allow me to make a small commission off your purchases. The money is earned at no additional cost to you.
If you’d like to learn how to make a lined zipper pouch, you’ve come to the right place.

Zipper pouches are a great way to eliminate scrap fabric.
Likewise, they are a wonderful option for storing small items. For this tutorial, you’ll need:
- 1 zipper
- Top fabric (woven fabric preferred)
- Lining fabric (woven fabric preferred)
- Medium weight interfacing
- Thread
- Standard size 11 sewing needle
- Zipper foot
- Sewing machine/ (embroidery machine optional)
- Embroidery thread (optional)
- Heavy tear away stabilizer (optional)
I have a Youtube video of me creating the zipper pouch too. Feel free to follow along visual YouTube video and blog article too.
Measure twice cut once
I have a 7″ zipper and scrap fabric from other sewing projects. So, I cut 2 outside fabric and 2 lining fabric pieces at 7″ by 8.5″ to accommodate the zipper and zipper tape. You’ll also cut fabric the same way with fabric the same length and width as your zipper.

Embroidery (optional)
To add an a personal touch to the zipper pouch, add custom embroidery! To embroider your pouch, fold one piece of top fabric to form a crease. Spray temporary adhesive on a piece of heavy tear away stabilizer. Place the creased fabric on top of the stabilizer. Then, line up the fabric crease with the center line on your embroidery hoop and hoop the material drum tight.
Make sure the needle on your embroidery machine is lined up with the center point of your fabric. Rotate your design to the proper position. Stitch!

Add stability to your fabric (optional)
For a more structured bag, add a piece of medium interfacing to the outside fabric. Simply cut the interfacing 1/2″ smaller than your outside fabric and iron it in place.
Iron
Iron all 4 pieces of fabric so they lay 100% flat.
Pin’em up
Place one lining fabric face up. Place the 7″zipper edge on top of the fabric lining face up. Then, place 1 top fabric face down on the zipper. Use wonder clips to hold the 3 fabrics together.
Sew
Put the zipper foot onto your sewing machine. Began sewing from the end without the zipper pull. Once you get close to the zipper pull, place your needle in the down position. Then, lift the presser foot up. Zip the zipper up past the presser foot. Place the presser foot down and continue sewing.
Repeat.
Pin the completed side of your zipper pouch out of the way. Then, repeat the previous steps for the opposite side of your zipper pouch. Lining fabric face up. Zipper face up. Outside fabric face down.
Iron Again.
Iron the zipper pouch flat for a crisp finish.
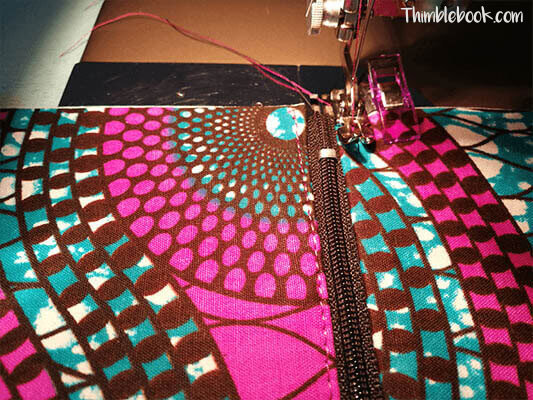
Top stitch.
Increase the stitch length on your sewing machine and do a line of stitching close to the zipper. Your stitch should sit right on the edge of your outside fabric. You can get creative with the thread colors here!
STOP. Unzip your zipper.
Don’t skip this step. Otherwise, you won’t be able to open the zipper pouch.
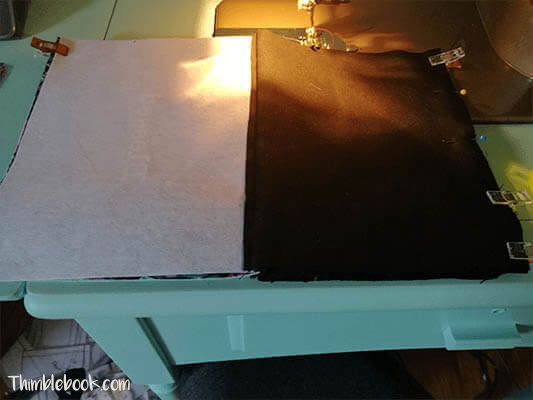
Again with the Pins.
Pin the outside fabric together with right sides facing. Also, pin the lining fabric together with right sides facing. Turn the zipper teeth towards your lining fabric. Pin the zipper in place to make sure it doesn’t shift.
Congrats. Your almost done learning how to make a lined zipper pouch!
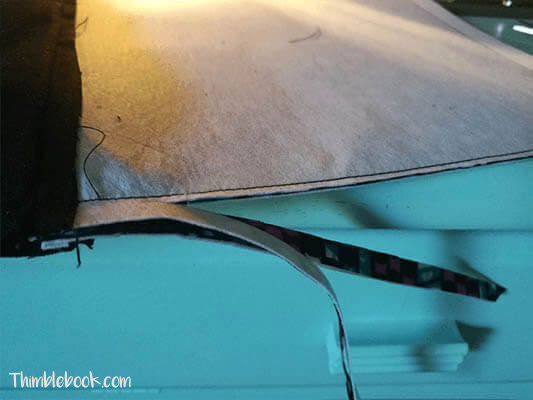
Sew all the way around your zipper pouch at 1/2.” However, you must leave an opening in the lining fabric so you can turn the pouch right side out.
Trim.
Trim the seams and clip the seams at an angle on the corners. Don’t forget to trim the excess seam around the zipper.
Turn your bag…
…right side out. Sew the lining fabric closed. Tuck the lining fabric inside your bag. Done! Hope you enjoyed learning how to make a lined zipper pouch.
No Comments
Comments are now closed.