

How to Upholster A Microsoft Sculpt Mechanical Keyboard
*This post may include affiliate links, which allow me to make a small commission off your purchases. The money keeps the website afloat and is earned at no additional cost to you.
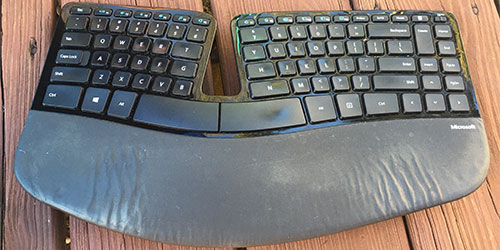
This tutorial will be useful to anyone wishing to cover their Microsoft Sculpt or Microsoft Surface keyboard wrist rest for office esthetics and/or hygiene reasons. I’ve owned a Microsoft sculpt mechanical keyboard for the past 10 years. The keyboard is still in working condition, but the wrist rest looks downright nasty. Today, I will be re-upholstering the wrist rest to keep my beloved keyboard out of the landfill.
Microsoft Sculpt Ergonomic Keyboard
Microsoft Surface Ergonomic Keyboard (Newer Silver Version)
What’s needed for covering your Mechanical Keyboard?
- Gloves (Your local dollar store)
- Prying Tool
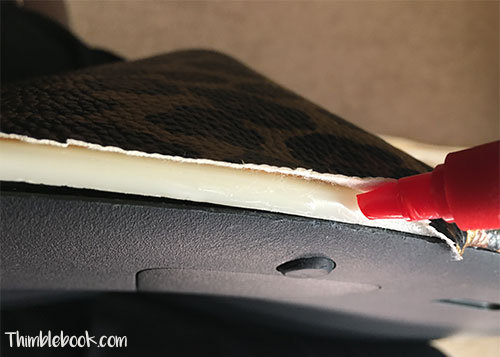
- E-6000 glue
- Faux Leather Wide Ribbon * I got mine from Hobby Lobby and it was 8″ wide and 24″ long. However, you may want to order via the Amazon link as an added convenience.
Why leather?
While fabric looks very nice, it isn’t easy to clean. For example, the newer Microsoft Surface uses Alcantara material for the wrist rest and many users complain of the material showing dirt and stains. Since the wrist rest isn’t removable for washing, this is a huge problem. Faux leather is a better material to use because it is comfortable on the wrist and can easily be sanitized.
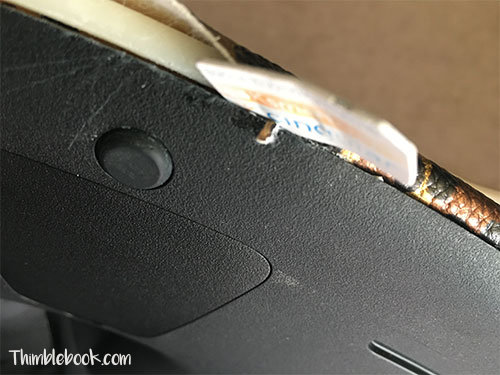
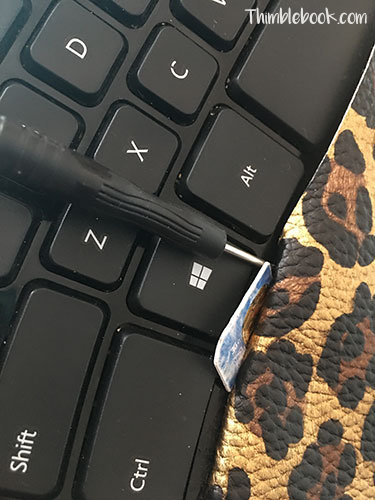
Prying
Use the prying tool to lift up the wrist wrest. You will hear the snaps disengage. Then, the old fabric will slide right off. You may wish to remove the entire wrist rest altogether. However, in my experience, I found the wrist wrest far too difficult to 100% remove because the plastic snaps are so fragile.

Trace N Cut
Place the old material on top of your new fabric. Use painters tape to hold it in place. Then, cut around the outside of your old fabric to make a perfect replica of old piece of fabric.
Tuck
Center your new piece of fabric on the keyboard wrist rest. Start bottom center of the keyboard by placing a small dot of glue.
Tuck the fabric in and press down for a few seconds.

Continue gluing and tucking until you have covered the entire bottom half + one side of the keyboard rest.
Then, gently tuck in fabric along the top without adding glue. To complete the project, glue and tuck fabric on the remaining side.
Don’t repeat my MISTAKES!!!
- I trimmed the fabric to fit into left and right sides. It was a huge mistake because there wasn’t enough excess fabric to tuck in on one side. Once you have completed the bottom half + one side of the keyboard rest, it will seem like there is too much fabric to tuck into the top part of the keyboard wrist rest. Please, learn from my mistake and RESIST THE URGE TO TRIM FABRIC.
- Glue was added to the top edge of Microsoft sculpt to ensure the fabric would stay in place. The glue got onto the actual keyboard and was impossible to remove. DO NOT USE GLUE ON ANY PART CLOSE THE KEYBOARD KEYS. Instead, you only need to tuck the fabric in and use small dost of glue on the right and left sides to complete Microsoft Sculpt mechanical keyboard reupholstering project.
- I tried to use goo gone and acetone to remove glue residue. The goo gone didn’t work at all. But, the acetone left light streaks on my keyboard and a removed paint from the faux leather 🙁 Try to wipe away any access glue before it dries. Once it is dry, it is a permanent situation!
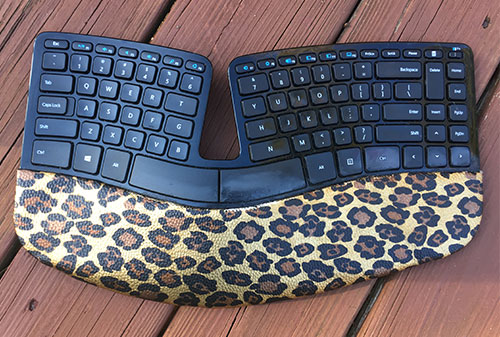
End Results of Microsoft Sculpt mechanical keyboard project
Your keyboard will turn out better than mine because I was the test dummy on this project! Overall, it was a success because the keyboard wrist rest is now clean. Please do share your end results via social media:-)
No Comments